
# SeaTunnel安装指南
Seatunnel 提供两种使用方式:
- 解压安装:单节点安装时推荐使用;
- 集群部署安装:多节点安装时推荐使用。
介质名称:apache-seatunnel-7.1.0-bin.tar.gz
# 方式一:单节点解压安装
Seatunnel 单节点部署时需要和 DolphinScheduler 的worker节点部署在同一台服务器。(Seatunnel 既作为客户端提交任务也作为服务端运行任务)
# 1. 解压 seatunnel
tar -zxvf apache-seatunnel-7.1.0-bin.tar.gz -C /home/seatunnel
# 2. 修改配置文件
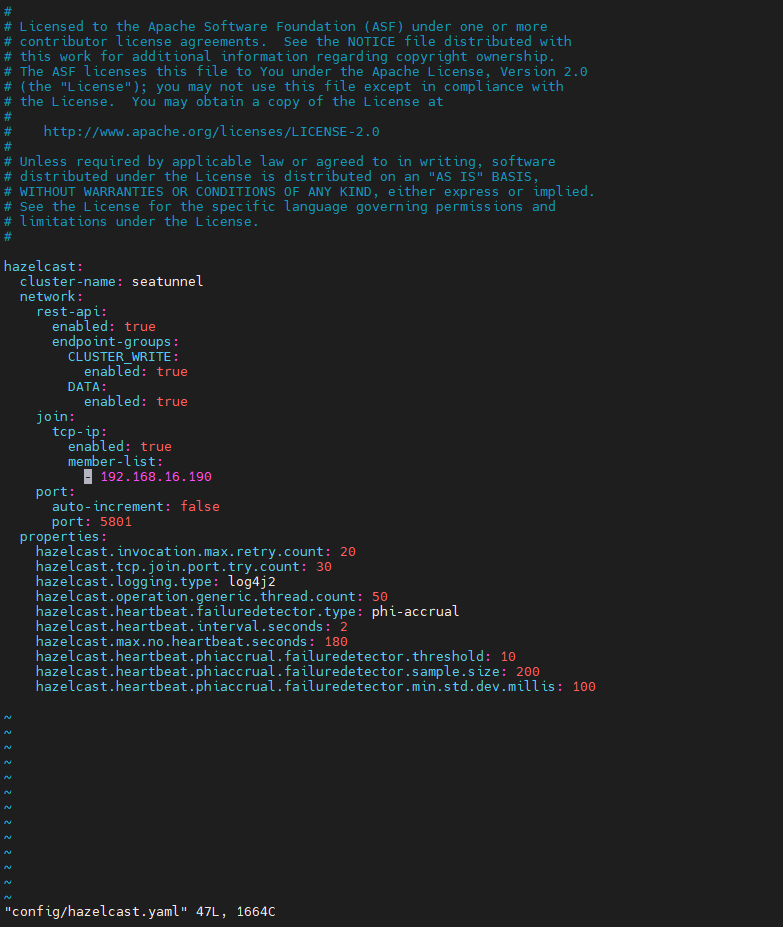
- 编辑 ${SEATUNNEL_HOME}/config/hazelcast.yaml 文件,修改
member-list参数值为单节点ip或域名。说明:
本安装示例的文件路径为:/home/seatunnel/apache-seatunnel-7.1.0/config/hazelcast.yaml
vim /home/seatunnel/apache-seatunnel-7.1.0/config/hazelcast.yaml
hazelcast:
  cluster-name: seatunnel
  network:
    rest-api:
      enabled: true
      endpoint-groups:
        CLUSTER_WRITE:
          enabled: true
        DATA:
          enabled: true
    join:
      tcp-ip:
        enabled: true
        member-list:
          - 192.168.16.190
    port:
      auto-increment: false
      port: 5801
  properties:
    hazelcast.invocation.max.retry.count: 20
    hazelcast.tcp.join.port.try.count: 30
    hazelcast.logging.type: log4j2
    hazelcast.operation.generic.thread.count: 100
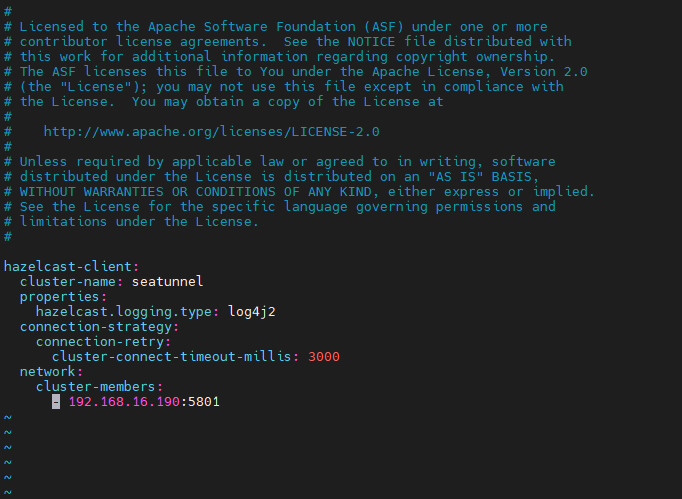
- 编辑 ${SEATUNNEL_HOME}/config/hazelcast-client.yaml文件,修改
cluster-members参数值为单节点ip或域名。说明:
本安装示例的文件路径为:/home/seatunnel/apache-seatunnel-7.1.0/config/hazelcast-client.yaml
vim /home/seatunnel/apache-seatunnel-7.1.0/config/hazelcast-client.yaml
hazelcast-client:
  cluster-name: seatunnel
  properties:
    hazelcast.logging.type: log4j2
  network:
    cluster-members:
      - 192.168.16.190:5801
- 编辑 ${SEATUNNEL_HOME}/config/seatunnel.yaml文件,修改
fs.defaultFS参数。本手册中文件路径为:/home/seatunnel/apache-seatunnel-7.1.0/config/seatunnel.yaml
vim /home/seatunnel/apache-seatunnel-7.1.0/config/seatunnel.yaml
- 当使用 HDFS 存储文件时,修改
fs.defaultFS值为 hdfs 路径
storage.type: hdfs
fs.defaultFS: hdfs://localhost:9000
- 当使用 LocalFile 存储文件时,修改
fs.defaultFS值为服务器的本地路径
storage.type: hdfs
fs.defaultFS: file:///
# 3. 修改拥有者
chown -R dws:dws /home/seatunnel
# 4.启动停止Seatunnel Server
启动 Seatunnel Server 命令:
su dws
cd /home/seatunnel/apache-seatunnel-7.1.0
./start-standalone.sh
停止 Seatunnel Server 命令:
su dws
cd /home/seatunnel/apache-seatunnel-7.1.0
./stop-standalone.sh
# 方式二:集群部署安装
前置条件:集群机器已配置免密登录。安装必读
# 1. 解压 Seatunnel
tar -zxvf apache-seatunnel-7.1.0-bin.tar.gz  -C  /opt/
chown -R dws:dws   /opt/apache-seatunnel-7.1.0
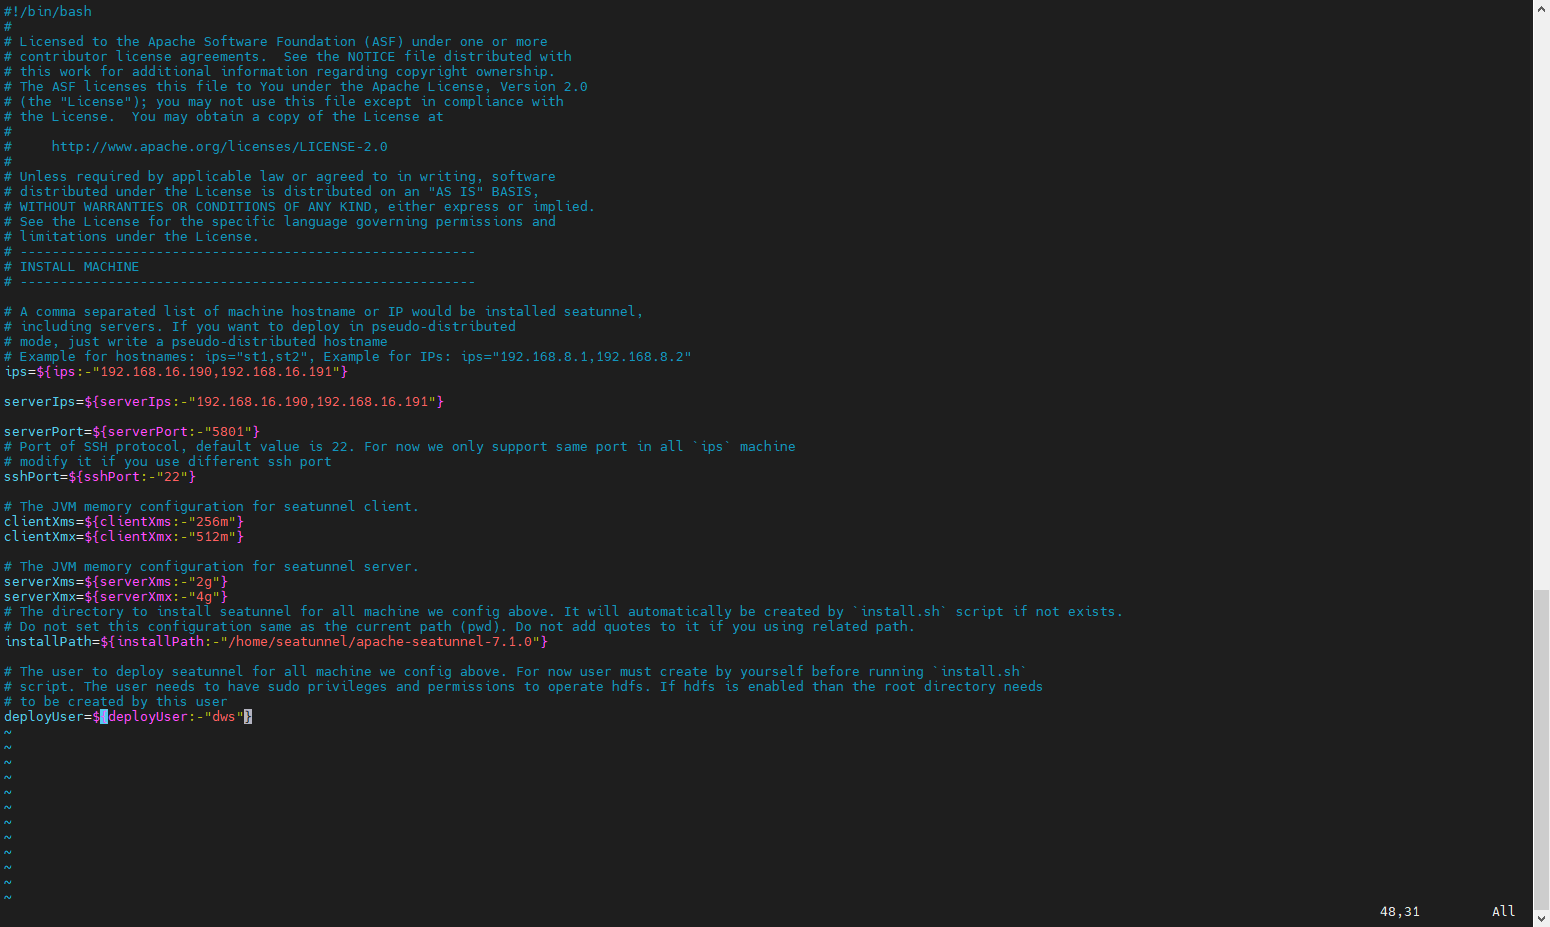
# 2. 修改 install_env.sh 脚本
修改 install/install_env.sh 脚本中的ips和installPath参数值为需要集群部署的机器地址和安装路径。
vim install/install_env.sh
ips=${ips:-"192.168.16.190,192.168.16.191"}

serverIps=${serverIps:-"192.168.16.190,192.168.16.191"}  #指定哪些服务器作为server端

serverPort=${serverPort:-"5801"}

sshPort=${sshPort:-"22"}

clientXms=${clientXms:-"256m"}
clientXmx=${clientXmx:-"512m"}

serverXms=${serverXms:-"2g"}
serverXmx=${serverXmx:-"4g"}

installPath=${installPath:-"/home/seatunnel/apache-seatunnel-7.1.0"}

deployUser=${deployUser:-"dws"}
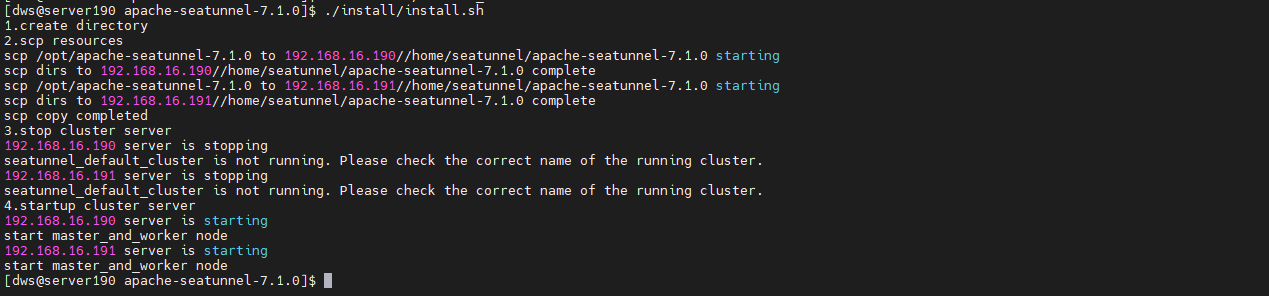
# 3. 集群安装
install/install.sh脚本,自动在集群机器上安装seatunnel并启动。
su dws
./install/install.sh
# 4.启动停止Seatunnel 集群
提示:
若配置的集群在执行数据同步作业时,报错类似 /home/seatunnel/bin/seatunnel.sh:行117:java:未找到命令,则需要配置用户级环境变量,执行用户如dws对应的环境变量。 编辑 ~/.bashrc 文件并使其生效。
su dws

vi ~/.bashrc

#/usr/local/jdk1.8.0_202为JDK的路径

export JAVA_HOME=/usr/local/jdk1.8.0_202

export PATH=$JAVA_HOME/bin:$PATH

export CLASSPATH=.:$JAVA_HOME/lib/dt.jar:$JAVA_HOME/lib/tools.jar

source ~/.bashrc
启动seatunnel 集群命令:
su dws
cd /home/seatunnel/apache-seatunnel-7.1.0
./start-cluster.sh
停止seatunnel 集群命令:
su dws
cd /home/seatunnel/apache-seatunnel-7.1.0
./stop-cluster.sh
停止集群中的某个节点可以在对应服务器上执行 ./stop-standalone.sh 脚本。
# Seatunnel运维操作(可选)
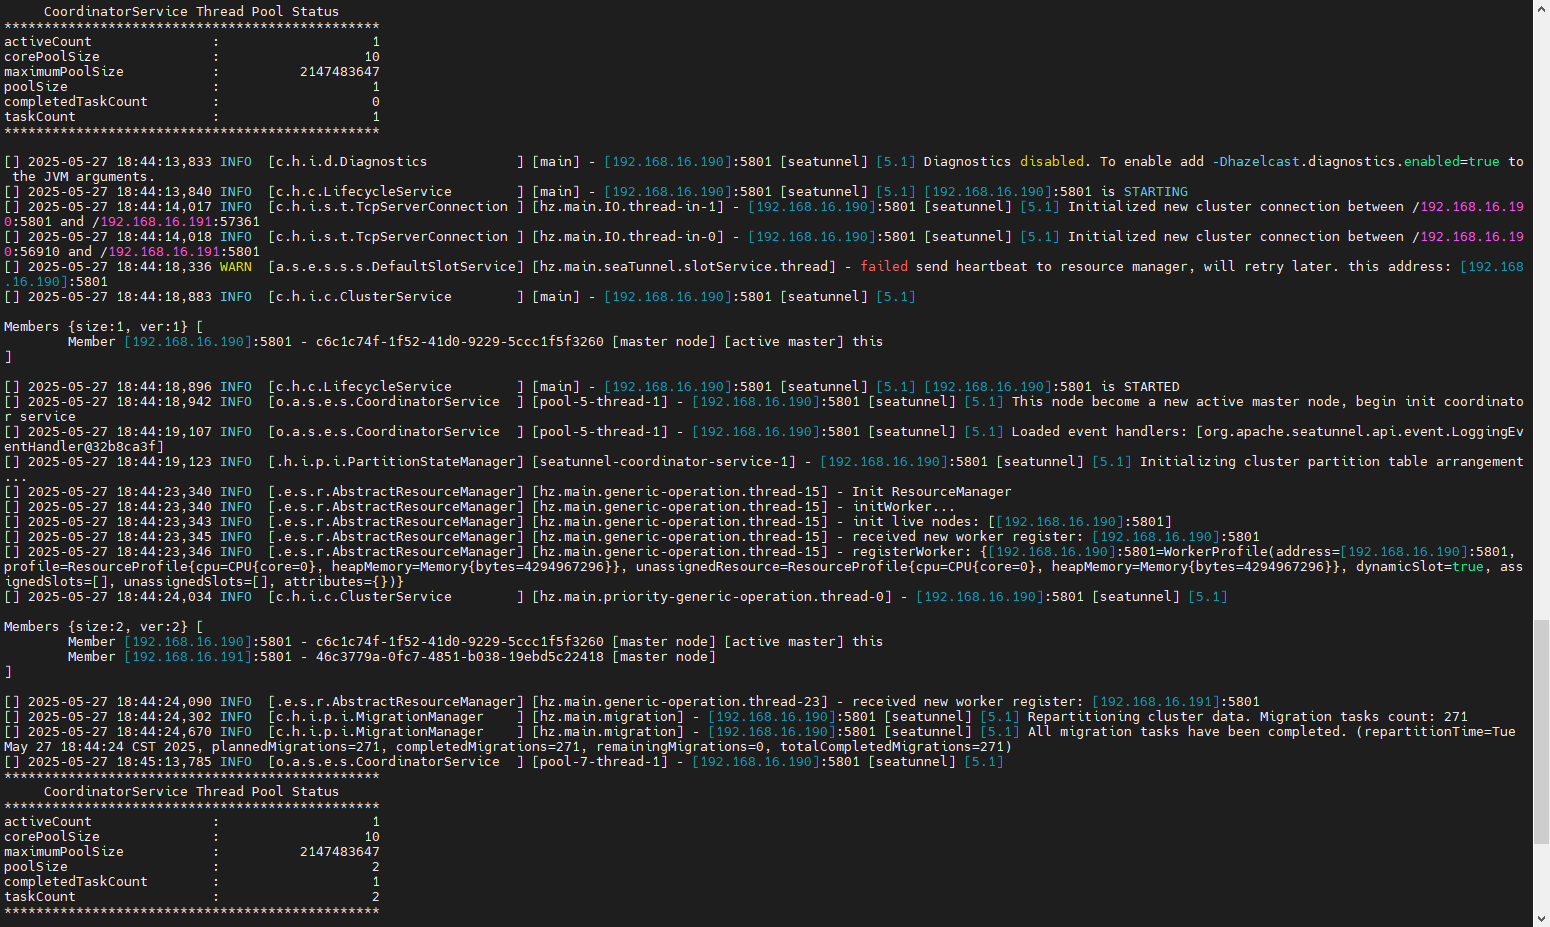
使用tail 命令动态查看Seatunnel 运行日志。
tail -200f ${Seatunnel安装目录}/logs/seatunnel-engine-server.log查询运行中任务列表
cd  ${Seatunnel安装目录}
./bin/seatunnel.sh -l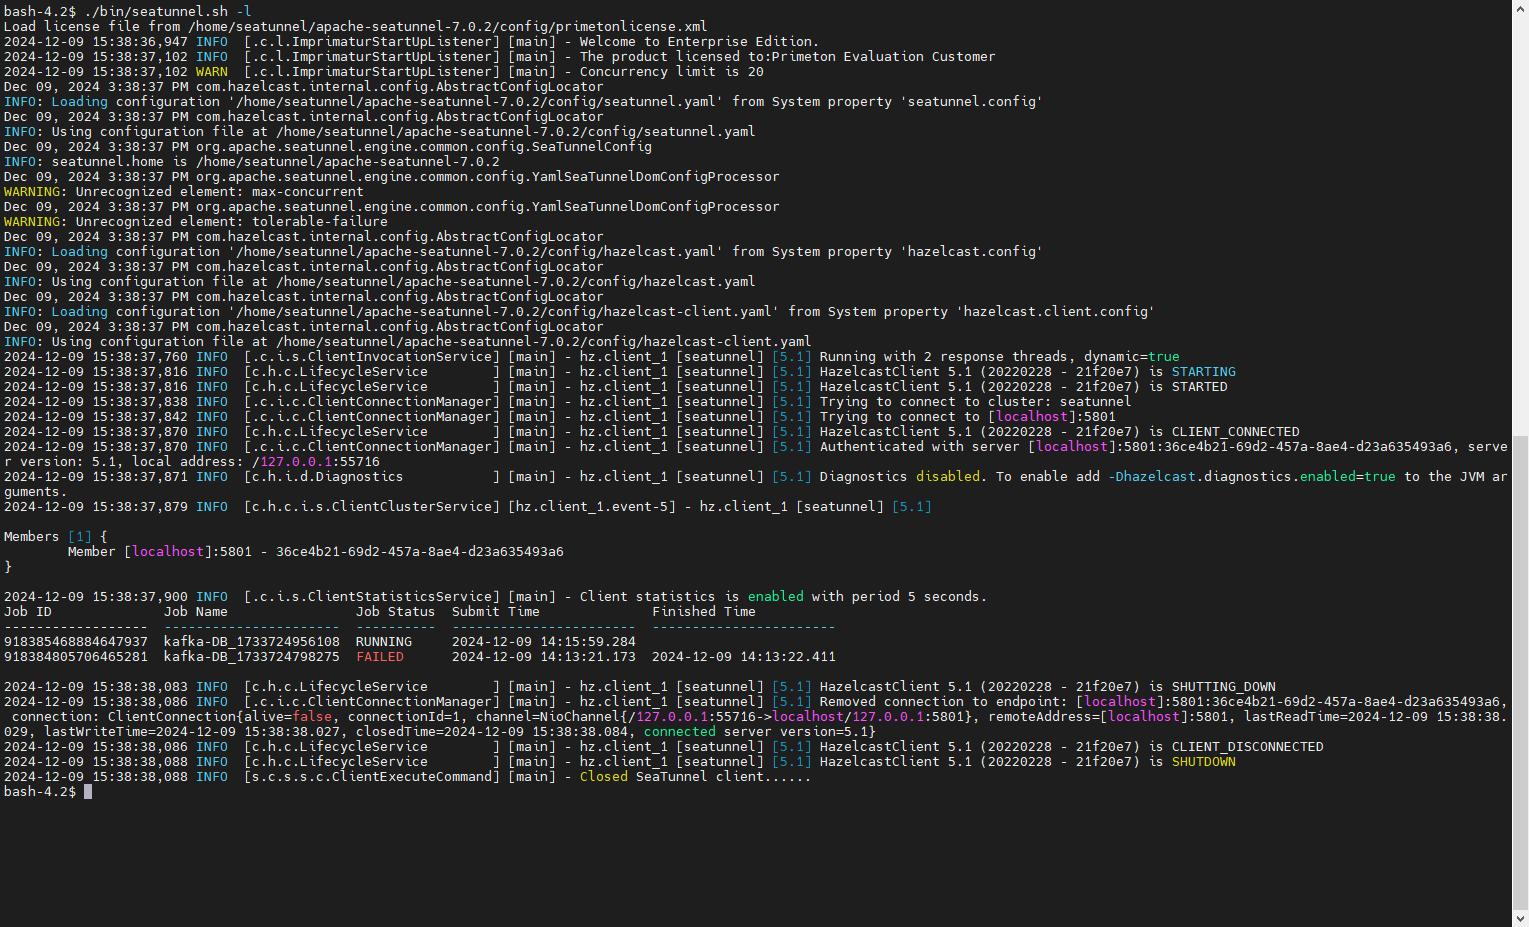
若需要手动停止seatunnel任务,使用如下命令
cd  ${Seatunnel安装目录}
./bin/seatunnel.sh -can ${Job ID}  	 	#Job ID可使用./bin/seatunnel.sh -l查看